Programming an interactive furniture builder
Background
Fringe Studio offers a kit of modular furniture for interior designers to design custom furniture builds. The studio needed a new way to handle custom orders.
Goal
Improve how Fringe Studio’s clientele submit orders for custom furniture builds.
Role
End-to-end design and development, which entailed:
- Understanding friction with ordering
- Examining project constraints
- Designing and testing a solution
- Programming a working application
Outcome
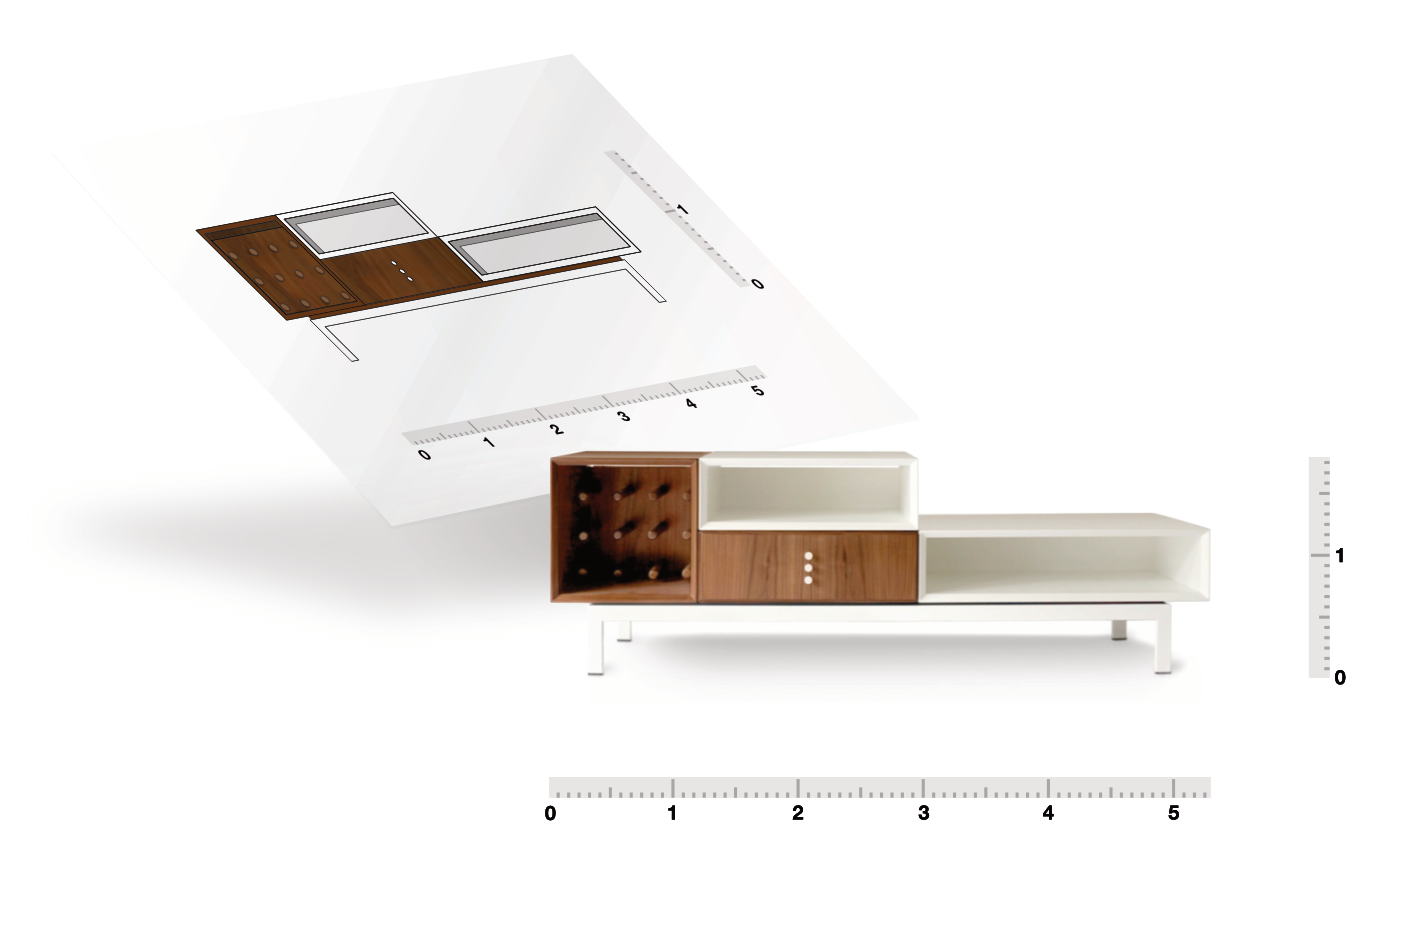
Whereas before clients would scan or fax hand drawn sketches of their custom builds, the application created a standard document that was easy for the studio to understand visually. After review, the studio would submit the list of parts to the fabricator without worrying that something might have been lost in translation.
Process
- Interviewed the studio to understand order fulfillment
- Made recommendations on how we could work around project constraints
- Interviewed interior designers to understand:
- How they thought about putting together a furniture configuration
- What the average configuration might look like
- What their expectations were around ordering
- Designed, tested, and implemented an application
Constraints
Order fulfillment was complicated. Standardizing shipping for the custom builds was near impossible since larger orders usually needed to be palletized. To add insult to injury, the studio’s CMS gave little in the way of configurability and database access.
We considering spinning up a separate virtual private server. After running into Cross-Origin Resource Sharing issues, we were forced to reassess our timeline and budget. We decided the best way forward was to build a client-side only application.
The proposed workflow would allow clients to visualize their custom build, generate a PDF, and then submit it to the studio for pricing.
Designing the interface
Interviews with interior designers made choosing a drag-and-drop interaction a no-brainer. It fit well with how they worked: usually laying out and rearranging swatches & samples while hunkering.
My initial concept for selecting furniture components was to have users modify furniture parameters before dragging and dropping them onto a canvas. I saw two benefits to this approach:
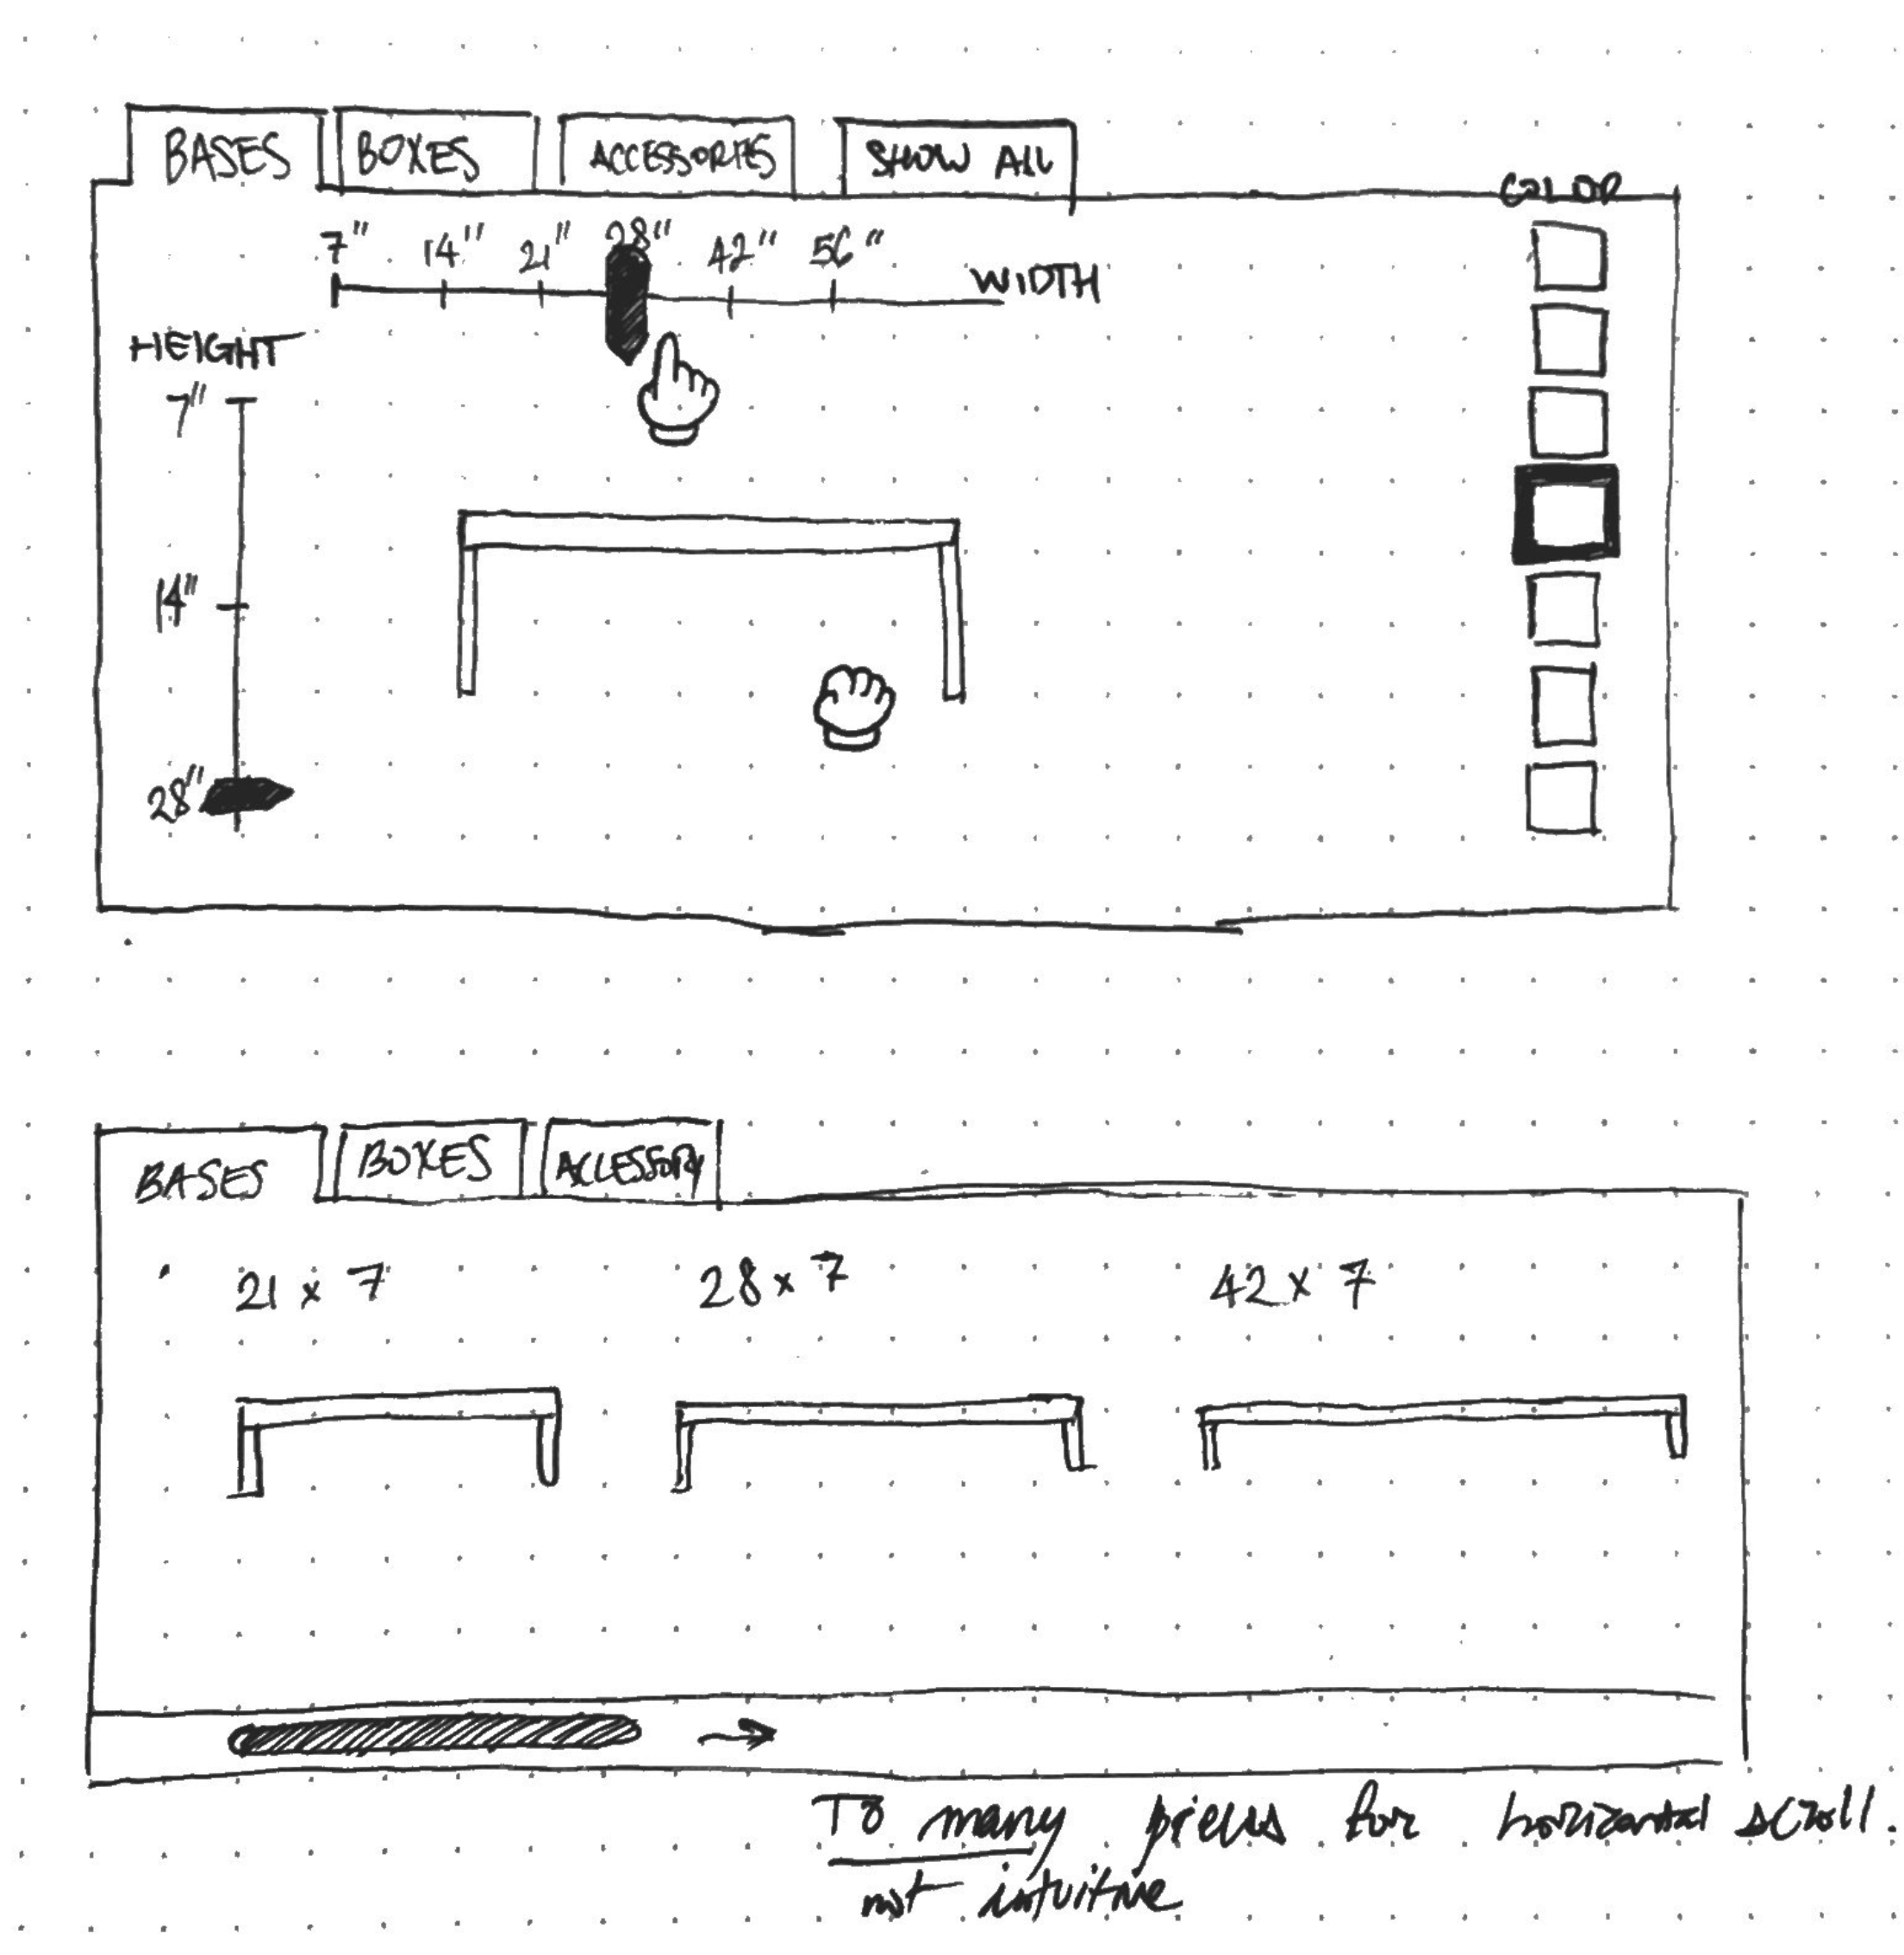
If everything fit neatly within the selection panel, I wouldn’t have to worry about a panel scrollbar causing issues with discoverability.
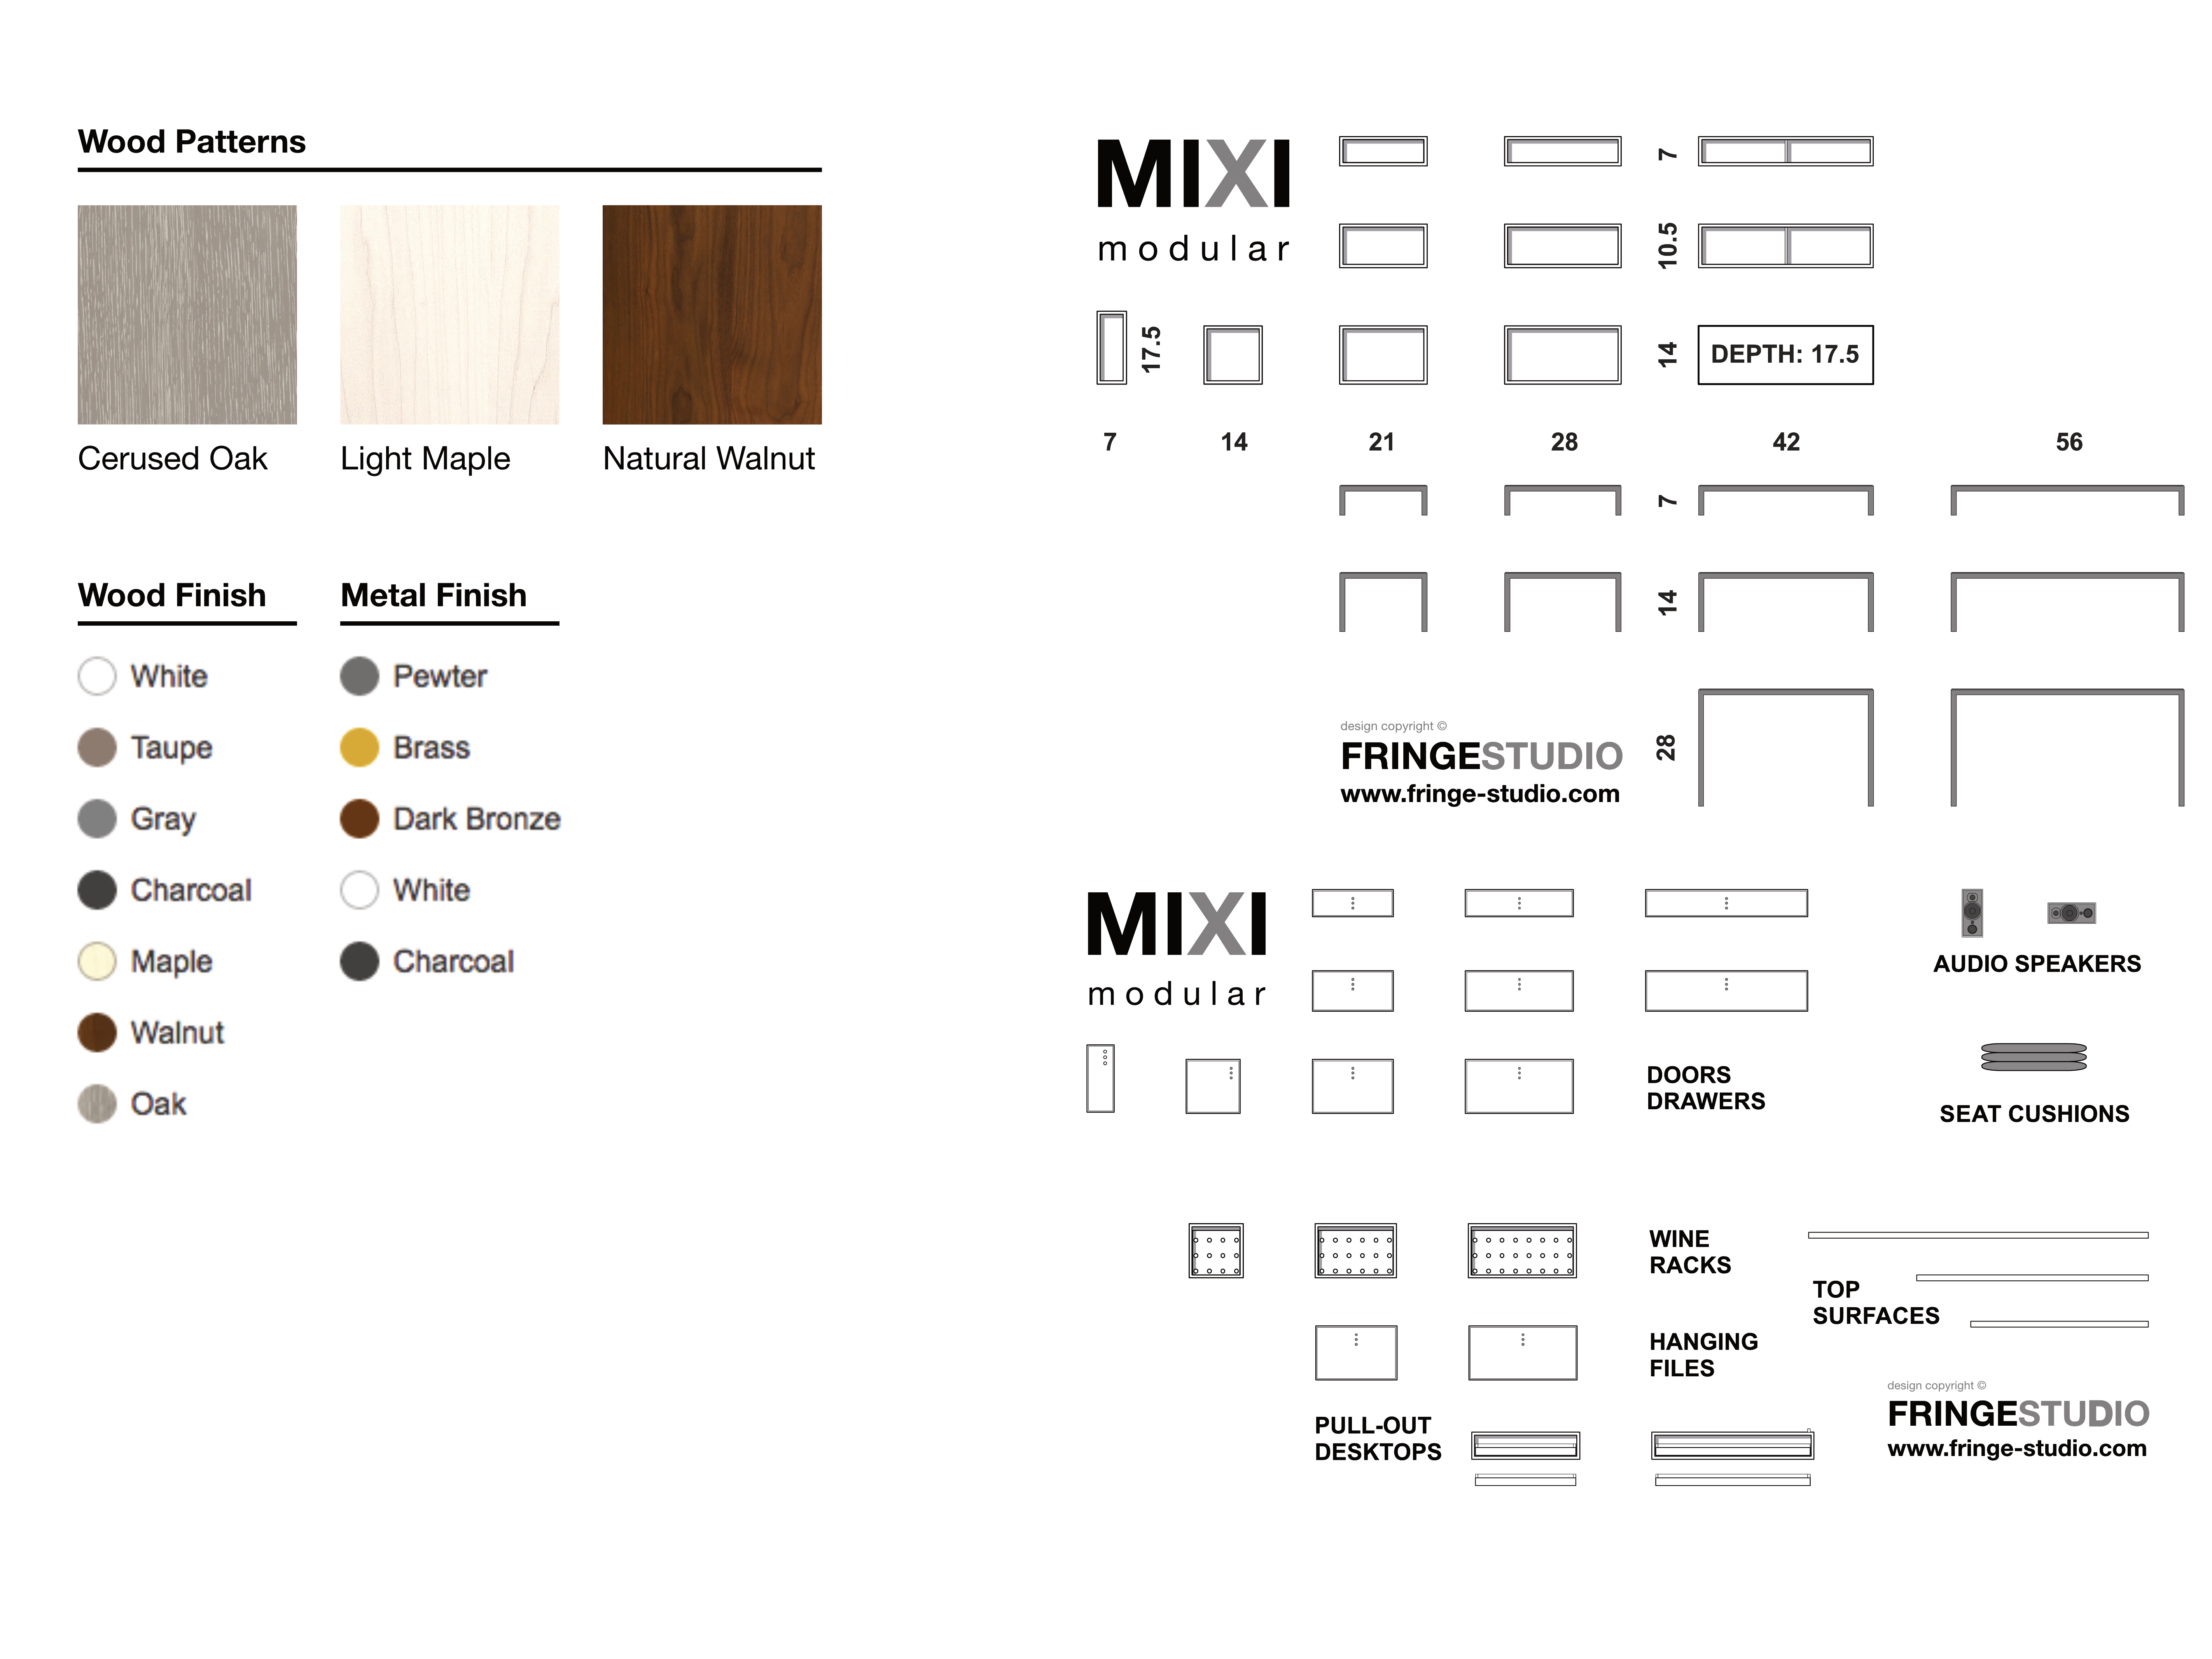
It aligned well with how I was starting to conceptualize the problem technically; from an object oriented perspective, the furniture components could be described as one of three object classes with variable parameters.
Testing how users selected furniture
A simple prototype was created to test the concept—it performed poorly. The interface just didn’t click for the majority of participants. More than half thought the furniture module was a static readout and strongly disliked selecting dimensions through the slide control.


Updating the selection panel’s design
After reviewing interview notes, it was apparent that I had overlooked a key part of how interior designers were approaching the problem. My initial design had assumed they had maximum dimensions for each piece, while in actuality, that constraint was only true for the overall dimension.
The tool needed to allow for a certain level of play: interior designers wanted to be able to see all the pieces laid out and compare them side-by-side. They were thinking about things spatially, not categorically.
I updated the design for the panel, moving it to the left hand side and listing out each permutation as it’s own item. Although there were some issues with users overlooking the dropdown controls, the second round of testing was much more reassuring. One thing that surprised me: every participant managed scroll to bottom of the panel; the scrollbar (in a column format) ended up being a nonissue.
Implementation
The distribution code for the application was essentially a concatenated blob of HTML, SVG symbols, and JS. The HTML was a simple set of frames that the JS would attach event handlers to. JS modules were bundled by Browserify.
I used jQuery Draggable and Droppable to remove the overhead of implementing drag-and-drop functionality.
SVG format was used because it could be easily inlined as text into the distribution bundle. The format made changing image colors and background patterns easy since their color properties could be controlled through CSS styles.
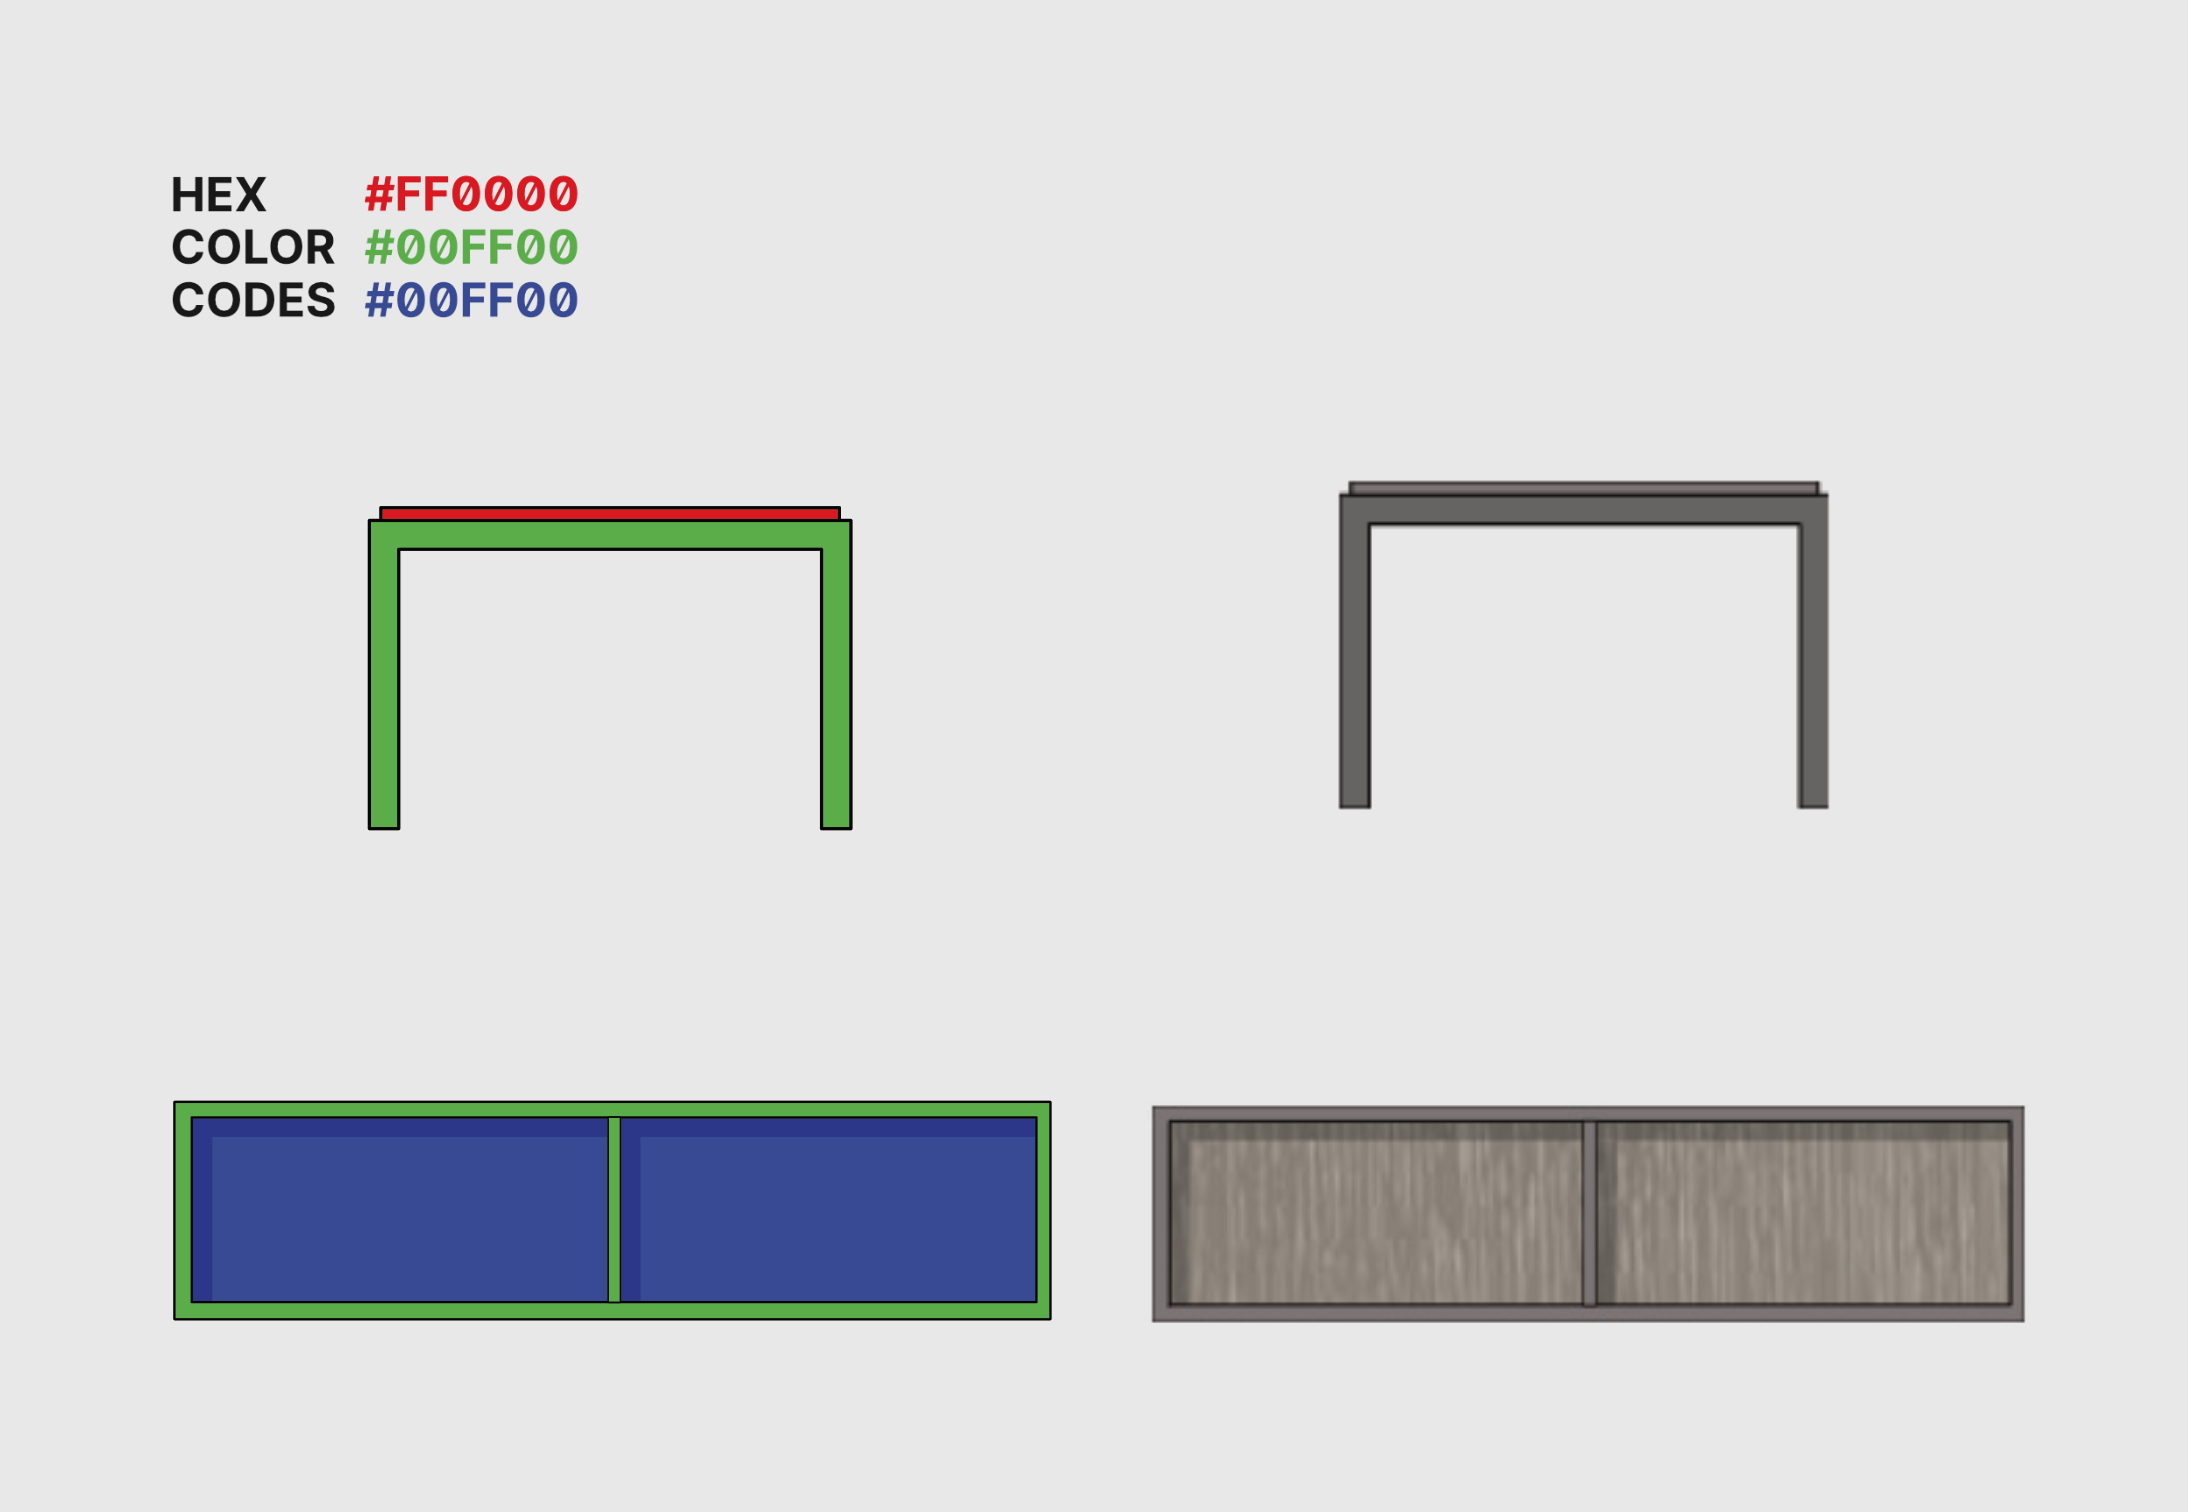
A Gulp pipeline was built
to prepare the images. It would stream the SVGs as raw text
through a helper function (addClass) which would
locate the target red, green, and blue colors, replacing them
with a CSS class. All the application JS had to do was change
the class name to change the color.
Assigning multiple colors was done through two separate
properties: one through the CSS background-color
property and the other through the SVG fill
property.

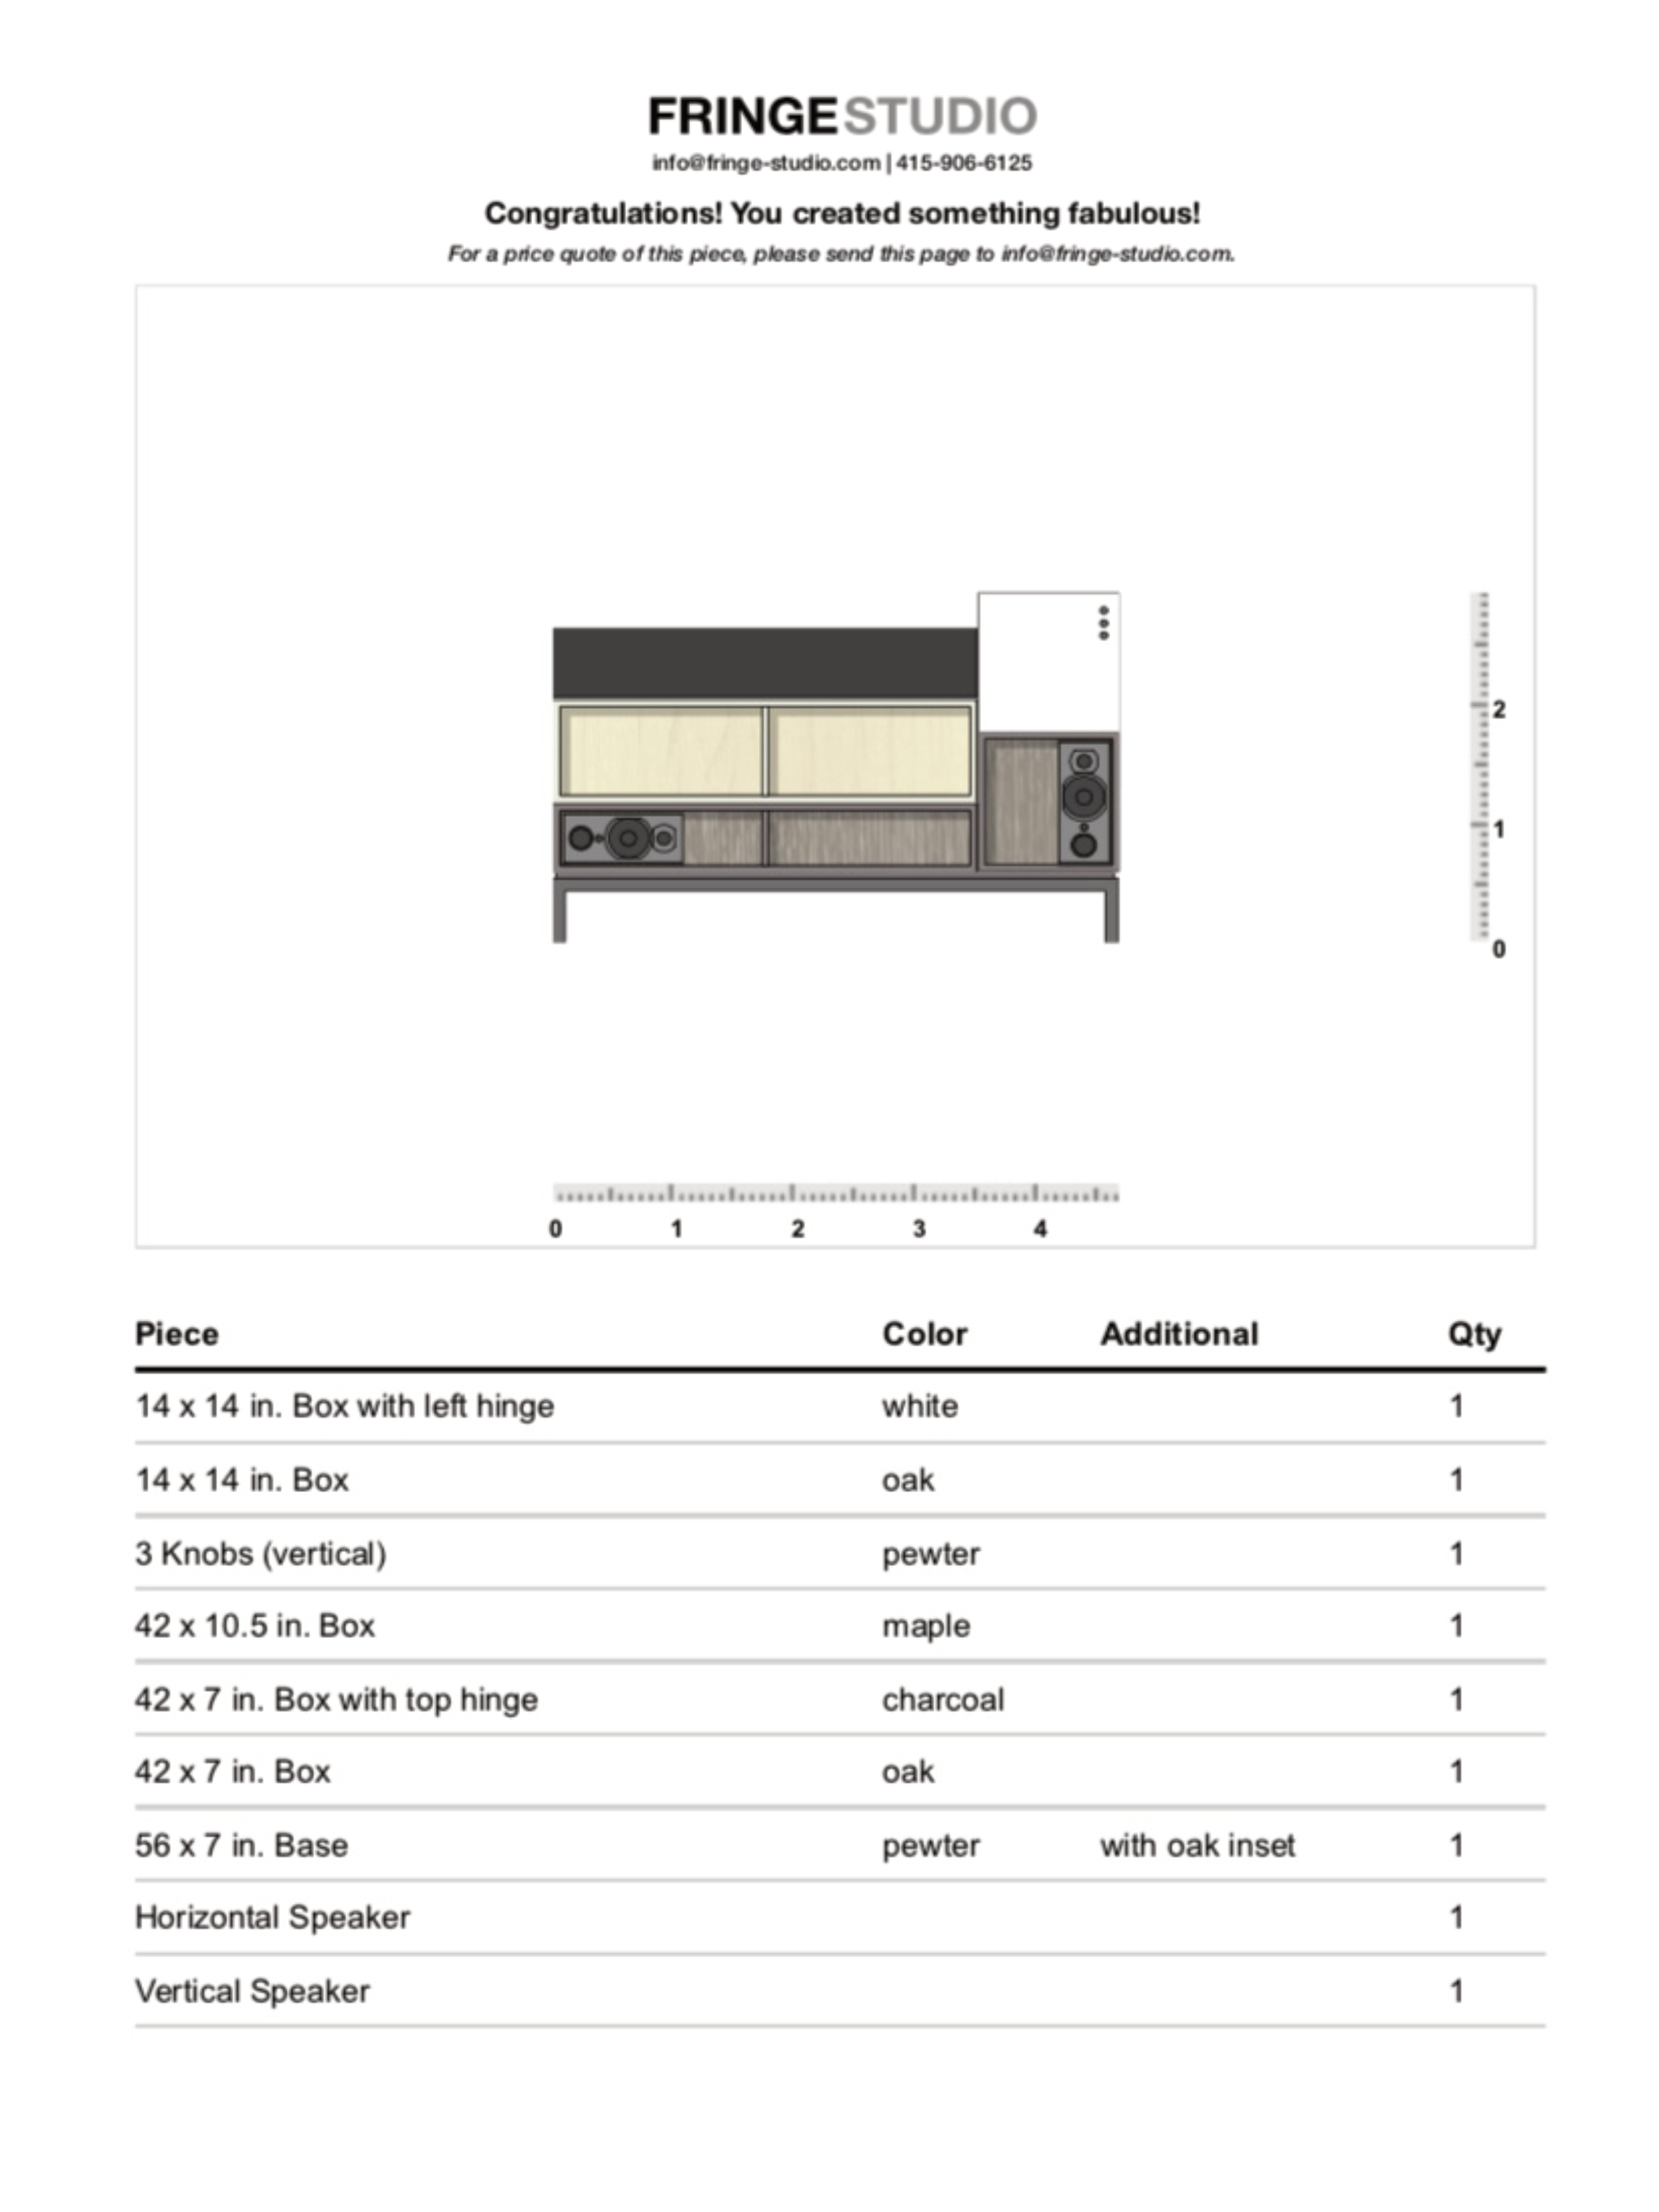
Generating the printable cut-sheet
Each piece of furniture and its relative position were stored in a JSON object. When a client would go to print the cut sheet, the data object would be iterated through, generating the printable list of parts.
The process wasn’t as seamless as I had wanted. PDF libraries like jsPDF didn’t offer enough functionality to automatically create the PDF. Luckily, the application was used by cohort of users who knew the workflow beforehand, so the friction of having to save a PDF from a browser print window was an annoyance instead of a deal breaker.
End result
The application gave interior designers an interactive way to build custom orders and outputted a single source of record that reduced confusion between the client, studio and fabricator.
